
A VPN is a way to connect to a network remotely. It works very much like wifi, once you are connected you can access all the office devices you would expect, as if you were there - file sharing servers, terminal servers, etc.
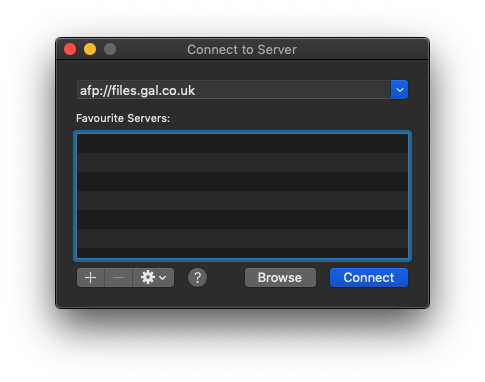
You will not see the servers in the Finder sidebar. Instead you will need to access them using a link in the form of afp://server.company.com or smb://server.company.com - contact us if you are not sure what the address you need is. See below for more information.
IMPORTANT
Accessing files remotely can be slow and unreliable at times and it's dependent on your internet connection. It's therefore best to copy the files across to your desktop, disconnect the VPN and work on them locally. You can then reconnect and copy them back to the server.
HOW TO USE
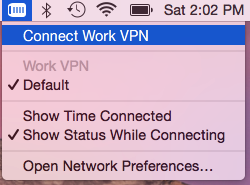
- Select Connect sonic vpn from the VPN menu (see this link: VPN Menu if you can't find it in your menu bar)
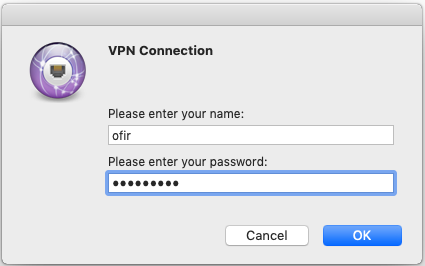
- Enter your password as arranged (your user name may already appear)
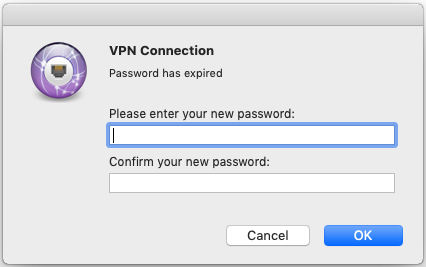
- If prompted to change your password - select a new one and enter it. The password must include numbers, upper & lower case characters and be at least 9 characters long.
- Once connected you can access all network devices in the office
- Disconnect the VPN when not in use, it can slow down your computer and affect others ability to use the service effectively
Note: the VPN is designed for remote access and will not work if you try to use it in the office.
TIME SAVING SHORTCUTS
The VPN Menu is a great time saver, activate it here: VPN Menu
Store the password securely
You can store the password so you don’t have to enter it each time. Here’s how:
- Select Network Preferences from the VPN menu
- Locate the sonic vpn on the left pane and select it
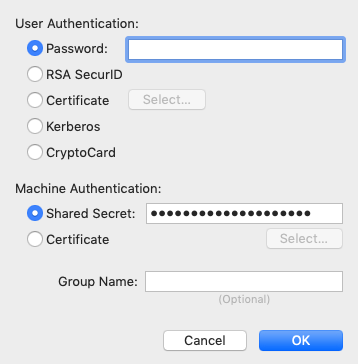
- Click Authentication Settings…
- Enter your password and click OK (do NOT change the Shared Secret)
- Press Apply - bottom right and close System Prefs
- Connect the VPN – you will not be asked for the password!
Quick Server Access
To make it easier to access your servers, click your Desktop/Finder, select Go > Connect to Server… from the top menu ( ⌘K ) and enter the server address. Press the plus (+) button at the bottom of the window to permanently store the server.
Comments
0 comments
Please sign in to leave a comment.